What Photos Should You Take Before Sending Your Car for Transport?
Written by the Agarwal Packers and Movers team at our Dehradun office. About us
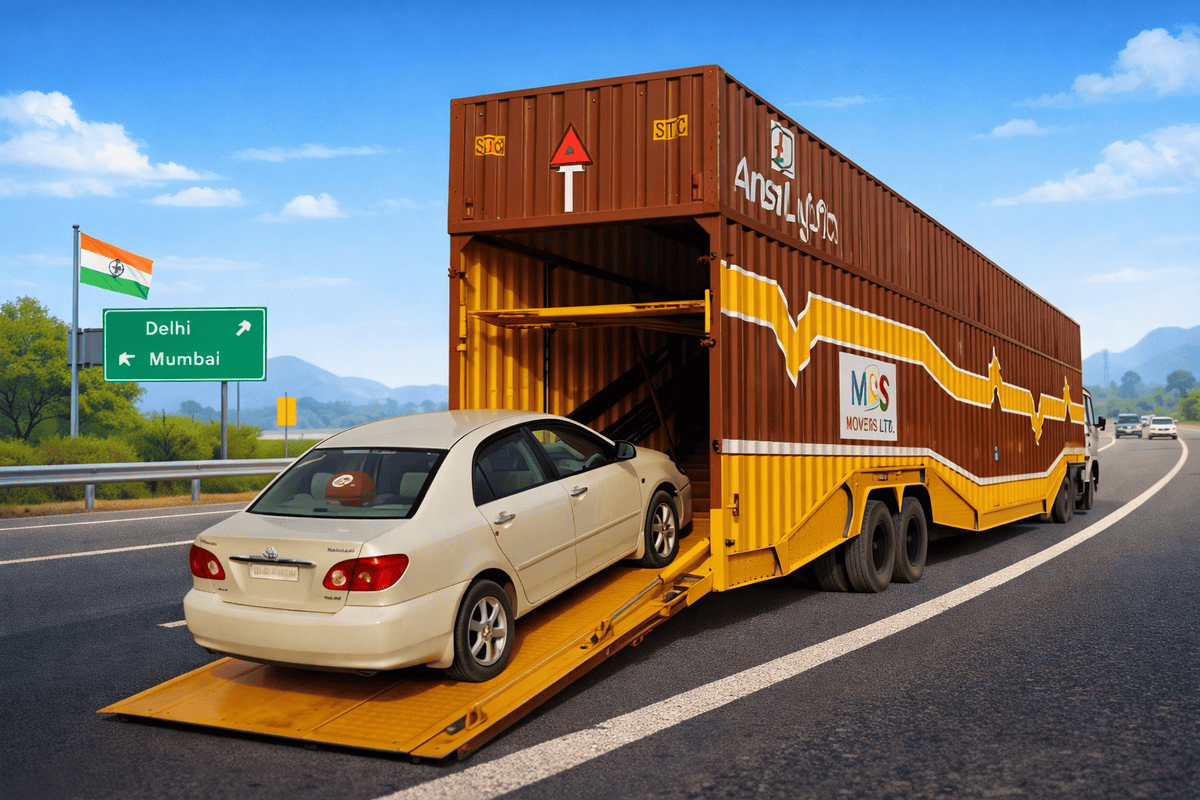
Before handing your car over for transportation, take clear photographs of its condition. From exterior scratches and wheel damage to the odometer and existing dents, this photo checklist helps you document your vehicle and makes it easier to compare its condition after delivery.
Sending your car to another city can be convenient, especially when you're relocating for work, moving with your family or purchasing a vehicle from a distant location.
But before handing over the keys, there's one simple step you shouldn't skip: photograph your car thoroughly.
Even when a vehicle is transported by a professional carrier, documenting its condition before pickup gives you a useful reference when it arrives. If you notice a new scratch, dent or other concern after delivery, your photographs can help you compare the vehicle's condition and support a discussion with the transporter.
The goal isn't to assume that damage will happen. It's to create a clear record before your car leaves your possession.
Here's exactly what to photograph before booking or handing over your vehicle for transport.
1. Take Photos of All Four Sides of the Car
Start with a complete visual record of the exterior.
Take photographs from these angles:
Front
Rear
- Left side
- Right side
- Front-left corner
- Front-right corner
- Rear-left corner
- Rear-right corner
Stand far enough away to capture the entire vehicle in each frame. Take the photos in good lighting, preferably outdoors, without strong reflections hiding the bodywork.
These wide-angle photographs provide an overall view of the car's condition and help identify visible damage in context.
Tip: Keep the camera approximately level with the vehicle instead of pointing steeply down from above. This makes body panels and dents easier to compare later.
2. Photograph Every Existing Scratch and Dent
Wide-angle photos are useful, but they may not show smaller imperfections clearly.
Walk around the vehicle and photograph any existing damage separately.
Pay particular attention to:
- Scratches on doors
- Dents on bumpers
- Paint chips on the bonnet
- Scuffs around wheel arches
- Marks on door edges
- Damage near the boot
- Scratches on side panels
- Existing bumper cracks
For each noticeable mark, take two photos:
A wider photo showing where the damage is located.
A close-up showing the mark clearly.
For example, a close-up of a scratch alone may not establish which door it is on. A wider reference image helps identify the location.
Don't edit out imperfections or apply filters that change the appearance of the vehicle. Keep the original, unedited photographs.
3. Capture the Wheels, Tyres and Alloy Rims
Wheels are easy to overlook when documenting a car, but they can have visible scuffs or damage.
Photograph all four wheels individually, especially if your car has alloy rims.
Check and document:
- Scratches on alloy rims
- Existing rim dents
- Scuffed wheel covers
- Visible tyre cuts or damage
- Missing wheel caps
- Existing damage around the wheel arches
If your vehicle has a spare wheel or unusual wheel accessories, photograph their condition too.
These photos can help distinguish pre-existing wheel damage from anything you notice after transportation.
4. Photograph the Windscreen, Windows and Lights
Glass and lighting components can be expensive to repair, so document their visible condition before dispatch.
Take clear photos of:
- The front windscreen
- The rear windscreen
- Side windows
Headlights
- Tail lights
- Fog lamps, if fitted
- Side mirrors
- Sunroof glass, if applicable
Look for existing chips, cracks, scratches or broken fittings.
Use a viewing angle that makes imperfections visible. Reflections can hide small cracks, so take additional photos from a different angle when necessary.
If you notice an existing crack or chip, point it out to the transporter and make sure it is recorded in the vehicle inspection report.
5. Record the Odometer Reading
Take a clear photograph of the dashboard showing the odometer reading before handing over your car.
This establishes the displayed mileage at the time of the photograph and provides a reference for the delivery inspection.
Where practical, photograph the dashboard with the ignition on while the vehicle is safely stationary.
Avoid starting the engine unnecessarily or operating the vehicle in an unsafe location just to take the photo.
If the transport service involves a driver moving the car under its own power rather than loading it onto a carrier, clarify the arrangements beforehand.
An odometer photo alone doesn't prove how the vehicle was transported, but it is useful supporting documentation.
6. Photograph the Interior
Even if your car is being transported on a carrier, it's worth recording the interior before pickup.
Take photographs of:
Front seats
Rear seats
Dashboard
- Steering wheel
- Centre console
- Door panels
- Boot or luggage compartment
- Existing stains, tears or scratches
Focus particularly on visible damage that might otherwise be difficult to describe later.
If the seats have leather upholstery, photograph existing scuffs or cracks. For fabric seats, document noticeable stains or tears.
You don't need dozens of nearly identical images. A few clear, well-framed photos of each relevant area are more useful than a large collection of blurry shots.
7. Document the Roof, Bonnet and Boot
Some damage is difficult to notice when you only photograph the sides of a car.
Take separate photographs of the roof, bonnet and boot lid.
Look for:
- Paint scratches
- Small dents
- Existing paint damage
- Marks from previous repairs
- Damage around the boot opening
- Scratches caused by previous roof accessories
If your car has a roof rack, spoiler or other exterior accessories, photograph those as well.
For a tall vehicle such as an SUV, use a safe viewing position. Don't climb onto the car or stand on an unstable object to reach the roof.
8. Photograph the Fuel Level and Dashboard Warnings
Take a photograph of the fuel gauge before the vehicle is handed over.
This provides a reference for the displayed fuel level at pickup. Follow the transporter's instructions regarding the amount of fuel permitted during transit.
You can also photograph any warning lights that are already illuminated on the dashboard, provided they can be documented safely.
If the vehicle has a known mechanical issue, tell the transporter before pickup and make sure the condition is recorded.
Don't assume that every warning light indicates transport-related damage. The purpose of the photograph is to document the vehicle's condition before the journey.
9. Photograph Accessories and Removable Parts
If your car has accessories or removable components, document them before dispatch.
Examples include:
Roof racks
Decorative exterior trim
Spoilers
Wheel covers
Aftermarket mirrors
Antennas
Removable electronic accessories
Ask the transporter which accessories can remain fitted and which should be removed before loading.
If you remove an accessory, store it safely and photograph its condition separately if it is valuable.
Also check whether personal belongings are permitted inside the vehicle. Many transporters restrict goods left in the car because of safety, liability or insurance conditions.
10. Take Photos During the Pickup Inspection
Your personal photographs are useful, but they should complement the transporter's official inspection record.
During pickup, ask the transporter or carrier representative to inspect the vehicle with you.
Make sure the pickup report records:
- Existing scratches and dents
- Glass damage
- Wheel or tyre damage
- Interior damage, where relevant
- Odometer reading
- Fuel level, where recorded
- Any visible mechanical or exterior concerns
Take photographs of the vehicle on the carrier if you have safe access and the transporter permits it.
Do not climb onto the carrier or enter restricted loading areas to get a better shot.
Keep a copy of the inspection report, booking confirmation and any vehicle handover receipt.
11. Take Photos Again When Your Car Arrives
Your documentation is most useful when you can compare the pickup condition with the delivered condition.
At delivery, inspect the car before signing the final handover acknowledgement, where practical.
Repeat the same exterior angles you used before pickup:
- Front and rear
- Both sides
- Four corners
- Wheels and tyres
- Windscreen and windows
- Headlights and tail lights
- Existing damage locations
Check the odometer and dashboard where appropriate, and inspect the interior for any visible changes.
If you notice damage that wasn't present in your original photos:
Photograph the new damage clearly.
Take a wider photo identifying its location.
Record the issue on the delivery paperwork where possible.
Notify the transporter promptly in writing.
Follow the applicable complaint or transit-protection claim procedure.
Keep your original photos, pickup inspection report and delivery documents together.
Avoid delaying the report while waiting to determine exactly how the damage occurred. Prompt documentation makes the issue easier to investigate.
Quick Checklist: Photos to Take Before Car Transport
Use this checklist before the carrier arrives.
{@body const photoItems = [ {section:"Exterior",items:["Front and rear of the car","Left and right sides","All four corners","Existing scratches and dents","Bonnet, roof and boot","Wheels, tyres and alloy rims","Windscreen, windows and lights"]}, {section:"Interior and dashboard",items:["Front and rear seats","Dashboard and centre console","Boot or luggage compartment","Odometer reading","Fuel gauge","Any existing warning lights"]}, {section:"Handover documentation",items:["Accessories and removable parts","Pickup inspection report","Carrier or handover condition photos","Booking confirmation and receipt"]} ]} {@body const [checkedPhotos,setCheckedPhotos] = DIL.useState([])} <box border radius="xl" padding={4} gap={4}> <row align="center" justify="between"> <title size="lg">Car transport photo checklist</title> <text color="secondary" size="sm">{checkedPhotos.length}/{photoItems.reduce((n,s)=>n+s.items.length,0)}</text> </row> <box background="surface-tertiary" radius="full" height="6px" clip> <box background="surface-inverted" radius="full" height="6px" width={${checkedPhotos.length/photoItems.reduce((n,s)=>n+s.items.length,0)*100}%} /> </box> {#each photoItems as section} <box key={section.section} gap={2}> <text weight="semibold">{section.section}</text> {#each section.items as item} <checkbox key={item} checked={checkedPhotos.includes(item)} onChange={v=>setCheckedPhotos(old=>v?[...old,item].filter(x=>x!==item))}>{item}</checkbox> {/each} </box> {/each} <row gap={2}> <button block variant="outline" onClick={()=>setCheckedPhotos([])}>Reset checklist</button> <button block onClick={()=>GenUI.copy(photoItems.map(s=>s.section+"\n"+s.items.map(i=>(checkedPhotos.includes(i)?"[x] ":"[ ] ")+i).join("\n")).join("\n\n"))}>Copy checklist</button> </row> </box>
Common Mistakes to Avoid
Taking only one photo: A single front-facing image won't document the full exterior or smaller imperfections.
Ignoring existing damage: Photograph even minor scratches and dents so the condition is recorded accurately.
Taking blurry or dark photos: Use good lighting and check that each important mark is visible.
Editing the originals: Keep unaltered photos so they remain a reliable record of the vehicle's appearance.
Forgetting the inspection report: Photos are useful, but the transporter's written condition report is also important.
Waiting until after delivery to raise concerns: Document and report any new damage as soon as reasonably possible.
Assuming photos guarantee compensation: Photographs can support a claim, but the outcome depends on the evidence, applicable terms, liability and any relevant transit-protection policy.
Frequently Asked Questions
1. How many photos should I take before sending my car for transport?
There is no fixed number. As a practical starting point, take eight exterior angle photos, then add close-ups of existing damage, wheels, glass, the interior, dashboard and odometer. Capture any other areas that need documentation.
2. Should I photograph existing scratches even if they are very small?
Yes. Take a close-up and a wider photo showing where the scratch is located. This helps establish the vehicle's visible condition before pickup.
3. Should I record the odometer reading before transportation?
Yes. A clear dashboard photograph provides a useful reference for the displayed mileage at pickup. Compare it with the delivery reading and ask the transporter about any unexpected difference.
4. Can these photos help if my car arrives damaged?
They can help document the condition before and after transportation. Keep the original images and inspection reports, report concerns promptly in writing and follow the relevant claim procedure.
5. Should I take photographs while the car is being loaded?
If it is safe and permitted, you can take photos of the vehicle's condition and its placement on the carrier. Follow the crew's instructions and stay away from active loading areas.
- Do I need to photograph the interior if the car is transported on a carrier?
It is sensible to do so. Interior photos document existing stains, tears and scratches, even when the vehicle is not expected to be driven during transit.
7. What documents should I keep with the photos?
Keep the booking confirmation, pickup inspection report, vehicle handover receipt, delivery paperwork and any transit-protection documents. These records can help when asking questions or reporting a problem.
Preparing Your Car for Transportation?
A few minutes spent photographing your vehicle can give you a useful record before it leaves your possession. Combine clear photos with an accurate inspection report and a careful delivery check.
Agarwal Packers & Movers can discuss your relocation requirements and help you understand the arrangements available for vehicle transportation.
📞 Call: +91 93681 08590 🌐 Visit: https://agarwalpackersnmovers.in
Book your FREE Home Survey & Quote and mention your car transportation requirements before confirming your move.
Related articles



Planning a move? These pages may help
Need packers and movers in Dehradun?
Free home survey and a written, binding quote — usually the same day.